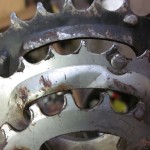
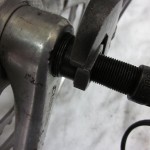
 Removing a crank is usually pretty straight forward. Insert tool and extract. It is all too often however that the tool is not tightened well enough into the crank threads which can lead to stripping. Make sure the extractor is fully unscrewed first so it does not hit the spindle as it is tightened. Make sure it threads in straight and tighten very well to provide the best chance of removing a tight crank. Heating the arm a bit may help loosen it but be sure to re-tighten the extractor before attempting to remove it.
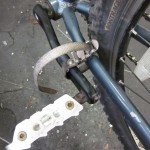 As with tight pedals you may want to strap the arm if this may help.
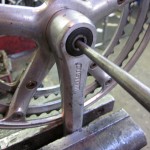 If an arm does strip, try putting it (and bike) in a vise as close to rings as possible (if d-side). Remove rings if this helps. Thread in a crank bolt until it almost makes contact with the arm flats (or put on nut to center punch on a nutted spindle) and hit spindle bolt repeatedly with a large punch. Twisting, shaking and heating the arm can help free it.
 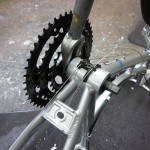 There is also a fork shaped wedge tool which might work but you risk damage especially to the frame if it has a plastic or inaccessible cup surface. Cutting the crank along the BB spindle flats can work on more stubborn ones especially when used in conjunction with the above methods.
Alternate: There is also a re-threading kit which allows the installation of a larger set of threads for a self extracting type crank bolt. For a crank that you may not want to throw away.
The same business about tightness applies to self extracting caps: be sure they are tight.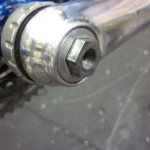 But if the cap seems as though it is likely to fail (i.e. crank seems especially tight when attempting to remove), remove cap and use a standard extractor. Don’t have the correct extractor cap tool? Improvise.
Cottered Crank Installation
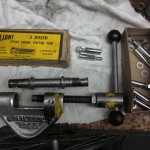 Replacing/ installing cotter pins on old cottered cranks can be quite tricky. Check to make sure the spindle/ flats are not damaged. You very often will need at least two new pins. Make sure they are the right diameter (hopefully the old ones can be of help). Brittish (3 spd) 9.5, French/ Italian/Other 9-8. Unless you are extremely lucky, you will have to file down the flats to get these old parts to work as pin options are limited. Once you have determined that the pin will fit snugly in the crank hole (i.e. is right diameter), try gently pushing or tapping both pins in to assess the situation. The pin flats should be close to, if not making, full contact with the spindle flats; the threads just sticking out enough so that when fully forced in there will be enough for the nut and washer. Hopefully the cranks are parallel as well. If not this can be addressed when filing. If everything worked out then you really lucked out. Most often you will need to file the flats down a bit in order to get them to fully engage the spindle and make threads accessible.
 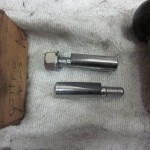 Clamping the pins flat up in a vise, file straight across the existing flat. File downward to lower the existing plane and not to steepen or lessen its angle. This will allow the pin to move into the crank hole further. Do this slowly,evenly and methodically. Count five passes on one and then do five passes on the other and then gently reinstall again to check progress. Remember that when you do eventually tighten them in it should be done very tightly with the press (don’t ruin the BB bearings by hammering!).
If the arms do not line up you may have to file down one pin more steeply or flatten one out a bit. Check to see which pin might need filing in any case and then determine how the steepening or lessening of its angle might help the arms get to parallel. For more extreme cases both might have to be filed: one flattened and one steepened. Good luck: Hopefully you have a few extra pins just in case.
Removing stuck pins can sometimes be equally challenging. Try bracing the arm over a sturdy vise (have helper hold and put on opening just wide enough for the pin) or position bike over a pipe while in the stand. Hit with a lg punch- or drill out if poss being careful to not hit the spindle.
Bending
Many casual-use cranks can be bent back into shape if not too badly damaged. Its your call when it comes to higher end, light weight components dep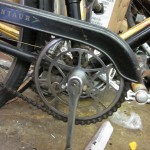 ending on how bent, what their intended use will be etc. Don’t chance anything but steel seems a pretty reliably compliant material with a known track record. It tends to just bend a bit easier with each successive bending. Keep in mind that about every old steel fork out there was “cold raked” (bent)- and works just fine.
That said many aluminum cranks may be bent back as well and bending back some of th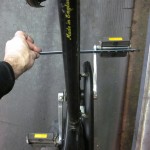 e wimpier cranks out there shouldn’t be too difficult; at least regarding the amount of force required. Buttery soft British 3spd cranks can often be bent back with a large crescent wrench, with specialty bending tools or in a vise. Determine that the bend is not simply in the pedals (sometimes both are bent), then eye the pedals/ crank in two positions: One when the pedals are 90 deg (perpendicular) to the ground and the other when they are parallel. In the 90 deg position compare the two pedal spindles with the BB
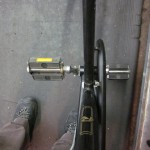 . They should be in a straight line. Do this with the pedals parallel with the ground as well. Use a ruler or straight object to help accentuate their position respective of the BB if needed.
With the pedals out, put the end of the crank in a vise (or use hand tools if possible) and twist/ bend appropriately. Think about the direction you’ll need to bend- often obvious by the BB’s relation to the flats of the vise. You’ll have to re-check progress by loo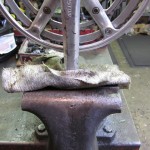 sely inserting the pedals.
Slightly bent inexpensive pedals can often be straightened somewhat but don’t do this on high end/ brittle spindled pedals. Pedals can and do brake catastrophically but if you want to chance, simply spin the spindles with the pedals off the 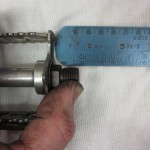 bike and in a fixed position. The spindle will wobble and you may be able to hold the wrench flats on the pedal in a vise (or between two flat steel objects in a vise) and bend it back. Or simply replace.
Tip: Try back pedaling to determine how and where a crank is bent. Think about how the arms feel and what just feels “wrong”. You can usually tell how a certain crank/ pedal is bent with a little thought while doing this.
Chain rings (chain wheels) can often be straightened/ trued with a rubber mallet when on the bike. Quickly check to make sure the BB spindle is not perhaps bent by eye-ing the spindle bolt while ghost pedaling in the stand (not common- it usually is the rings or crank). If just one ring (or perhaps two on a triple crank) are bent it shouldn’t be too difficult to straighten with a rubber mallet, pry bar or slotted bending tool, by checking true-ness against the f der . Check for bad teeth as well which can often be straightened individually or by filing off any burrs. One can sometimes also use a couple of crescent wrenches: One locked onto the bend and the other locked onto the first wrench for leverage. Chain ring straightening does take a bit of practice but when the alternative is a new one (or none at all if rare), its worth giving a try. Many bends can just be whacked back with a rubber mallet. Crank arm bends are admittedly difficult. Using a piece of wood positioned as a punch on the bent arm, try hitting. Be sure to not have frame clamped in stand or place bike on ground and/or directly against the “punch” while applying force to the center of crank via more wood.
Worn Rings
Check for ring wear before any of the above mentioned. Replacing is of course the easiest way out. And don’t forget to check if it might be one of recall history’s all time greatest warranty hits. The Shimano Alivio, Altus, Acera narrow armed cranksets. Score!…oh.. wait, needs a new BB, f der, chain…hey my 11t skips!
Pedals
Most inexpensive pedals are not deserving of OH for reasons of cost/ parts availability. New and old quality pedals might deserve overhauling if parts are available. For many newer pedals you may have to consult a manual as designs differ. For old standard pedals just don’t forget that the locking nut to the cone will typically be reverse of what the pedal threads are: Right pedal nut turns left to tighten, left turns right…Make sure keyed washers/ axle slots are intact and adjust so that they spin freely- or with an ever so small amount of play.
Stuck Pedals
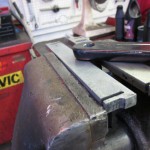
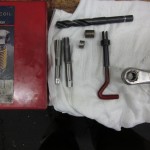 Frozen pedals can be a chore to get off. Use a good condition long handle pedal wrench with leverage/ heat if need be. If the pedal wrench can be leveraged against the floor or fit into a vise it may just come out. If the threads do strip (are pulled out with the pedal) a nice helicoil kit can often save the crank. Use the spring type helicoil for best results.

